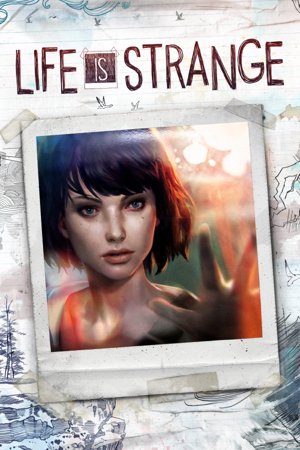
Life is Strange™
Achievement guide · roadmap · tracker
Life Is Strange is a five part episodic game that sets out to revolutionize story based choice and consequence games by allowing the player to rewind time and affect the past, present and future.
Macro Eyes
CommonTake optional photo #1 in Episode 1: Chrysalis
Chrysalis
CommonFinish Episode 1: Chrysalis
Finished Episode 1: Chrysalis
Red Eye
CommonTake optional photo #5 in Episode 1: Chrysalis
Inside your dorm room, to the left of the door is a mirror. Take a picture of yourself.
Out of Time
CommonFinish Episode 2: Out of Time
Finished Episode 2: Out of Time
Dynamic Range
CommonTake optional photo #7 in Episode 2: Out of Time
In the back area of the junkyard there is a doe, take a picture of it.
Chaos Theory
CommonFinish Episode 3: Chaos Theory
Finished Episode 3: Chaos Theory
Field Of View
CommonTake optional photo #1 in Episode 2: Out of Time
When you are in Kate's room to return her book, take a picture of the rabbit in the cage on the table.
Dark Room
UncommonFinish Episode 4: Dark Room
Finished Episode 4: Dark Room
Resolution Revolution
UncommonTake optional photo #10 in Episode 2: Out of Time
Once you enter the photography classroom, take a picture of Alyssa by the window.
Polarized
UncommonFinish Episode 5: Polarized
Finished Episode 5: Polarized
Manually Exposed
UncommonTake optional photo #8 in Episode 4: Dark Room
Inside the barn, you will need to climb into the loft. Toward the back of the platform you will find a owl. Take a picture of it.
Telephotogenic
UncommonTake optional photo #3 in Episode 1: Chrysalis
The Reflex
UncommonTake optional photo #3 in Episode 3: Chaos Theory
In the biology classroom near the windows is a small fish tank. Inspect it, then turn on the light to take the picture.
Compressed
UncommonTake optional photo #5 in Episode 2: Out of Time
After entering the diner, head left and into the bathroom and take a picture of the graffiti written on the mirror.
Light Leak
UncommonTake optional photo #10 in Episode 1: Chrysalis
Before speaking to Chloe, take a picture of her.
Histogrammar
UncommonTake optional photo #4 in Episode 3: Chaos Theory
Also inside the biology room, take a picture of the skeleton.
Framed
UncommonTake optional photo #3 in Episode 5: Polarized
Ask Mr. Jefferson for a last request - Then choose "One last picture".
Flash!
UncommonTake optional photo #10 in Episode 3: Chaos Theory
Pick up the camera next to Chloe and take a picture of her.
Colorized
UncommonTake optional photo #8 in Episode 2: Out of Time
After collecting and destroying all the bottles, Chloe will be laying on a car hood holding the gun. Take a picture of her.
Pinholed
UncommonTake optional photo #6 in Episode 3: Chaos Theory
Go to the bathroom and take a picture of yourself.
Ambient
UncommonTake optional photo #1 in Episode 4: Dark Room
Take a picture of Chloe at her desk.
Focused
UncommonTake optional photo #6 in Episode 1: Chrysalis
Inside Victoria's room there are photo's on her wall next to the door, choose to mess them up and take a picture of it.
Meter Made
UncommonTake optional photo #9 in Episode 2: Out of Time
In the science lab, speak with Warren (he will mess up his experiment), then rewind and speak with the teacher to get the correct answer. Return to Warren and tell him Chlorine, then snap a photo when he succeeds.
Time-Lapsed
UncommonTake optional photo #2 in Episode 4: Dark Room
In the garage, to the right of the lockers, move the plank and take a picture of the bird nest.
Full Exposure
UncommonTake optional photo #2 in Episode 2: Out of Time
Interact with the trash can near a bench to take out some food. This is placed on a bench for a squirrel to approach, walk up to it and take a picture.
Image Stabilizer
UncommonTake optional photo #4 in Episode 2: Out of Time
Go around the right side of the diner into the alley behind it and take a photo of the dog through the fence.
Zoomed In
UncommonTake optional photo #7 in Episode 1: Chrysalis
When you exit the dorm, warn Alyssa that Zack is gonna throw a football at her. If you warned her, the football will hit the window behind her instead. Take a picture of the crack.
Pixelated
UncommonTake optional photo #6 in Episode 2: Out of Time
In the junkyard, take a picture of the school bus.
Dioptric Power
UncommonTake optional photo #6 in Episode 4: Dark Room
At the beach, take a picture of the third dead whale.
Focal Pointed
UncommonTake optional photo #8 in Episode 1: Chrysalis
In the parking lot there is a RV in the corner where you can draw something on. Take a picture of the drawing.
Wide Angles
RareTake optional photo #2 in Episode 1: Chrysalis
Close-Ups
RareTake optional photo #4 in Episode 1: Chrysalis
Outside the dorms at the far side of the area there is a squirrel, take a picture of it.
Maximum Aperture
RareTake optional photo #9 in Episode 1: Chrysalis
When you get to the lighthouse, turn around and go down the path. There is a blue bird on a rock. Take a picture of it.
Rangefinder
RareTake optional photo #4 in Episode 4: Dark Room
Speak with Samuel about animals, then use the food next to him to lure out a squirrel. Take a picture of it.
Optican
RareTake optional photo #9 in Episode 3: Chaos Theory
Go to the right side of the diner and take a picture of the bird on the ground with a swarm of ants around it.
Fisheye
RareTake optional photo #7 in Episode 4: Dark Room
To the left of the barn, you'll have to quickly snap this photo of the bird on the fence before it flies away. Rewind if you miss it.
Sensor
RareTake optional photo #7 in Episode 5: Polarized
Head to the off-shoot to the right (the bathroom area) and take a picture of the giant squirrels outside the window.
Processor
RareTake optional photo #3 in Episode 2: Out of Time
When you get to the diner, look up and take a picture of the whale.
Viewfinder
RareTake optional photo #8 in Episode 3: Chaos Theory
Before you can take a picture of the truck, you need to speak with the owner outside the diner. Once he tells you the exact make and model of the truck, rewind and speak to him again using that as a key phrase. He'll be impressed and allow you to photograph it.
Balance
RareTake optional photo #3 in Episode 4: Dark Room
Look for a pile of rocks and take a picture of it.
Silhouettes
RareTake optional photo #10 in Episode 5: Polarized
You need to find five bottles in the junkyard. After finding all five, they will be sitting on a desk near the end. Take a picture of all the bottles lined up.
Night Vision
RareTake optional photo #2 in Episode 5: Polarized
Head to the right and downstairs into a small alcove. Pick up the camera there and take a picture of the girl on the bench.
Bokeh
RareTake optional photo #5 in Episode 3: Chaos Theory
Take a picture of Chloe in the principal's office.
Lenscrafted
RareTake optional photo #2 in Episode 3: Chaos Theory
After exiting the dorms, turn right and walk toward the squirrel on the bench. It will run away, rewind and you'll be able to take a picture.
Slideshow
RareTake optional photo #9 in Episode 4: Dark Room
Inside the bathroom, take a picture of Justin lined up with the skeleton graffiti on the half-wall.
Blowup
RareTake optional photo #5 in Episode 5: Polarized
Walk toward the building next to the diner with the car on the roof. You have to get the right angle to be able to take a picture.
Incandescent
RareTake optional photo #1 in Episode 5: Polarized
Comfort Kate, then take a picture of her.
RAW Strength
RareTake optional photo #7 in Episode 3: Chaos Theory
After helping Chloe's mom make breakfast, but before sitting down to eat it, open the window right next to the table, then find a bird sitting on top of a cabinet next to the door to the garage. Scare it once so it moves to the fireplace, then again so it flies out the window. Exit through the sliding door to the backyard and snap a photo of it on the fence.
Gamma Value
RareTake optional photo #5 in Episode 4: Dark Room
Inside the boy's dorm, look out the window in the hallway to the right and take a photo of the footsteps outside.
Visionary
RareTake all optional photos in Episode 1: Chrysalis
Each episode has 10 optional photo ops - this is the Episode 1 (Chrysalis) set. They're missable in a normal run, but Collectible Mode (unlocked once you finish the episode) lets you hop back and snap any you missed without touching your story save, so nothing is lost for good. Use Max's rewind to line up the trickier shots. A photo-location guide is the reliable way to bag all 10.
Camera Obscura
RareTake optional photo #4 in Episode 5: Polarized
After you stop the diner from exploding, turn around and take a picture of the whale on the road behind you.
Iris
RareTake optional photo #6 in Episode 5: Polarized
After arriving in the classroom yet again, inspect the etchings on the desk in front of you (might have to do it a few times), and then take a picture of it.
Lab Master
RareTake all optional photos in Episode 2: Out of Time
The 10 optional photos in Episode 2 (Out of Time). Missable on a first pass but fully recoverable via Collectible Mode after you finish the episode, so don't stress the ones you walk past. Rewind to reposition for awkward angles, and follow a photo-location guide for the exact spots.
Parallax View
RareTake optional photo #1 in Episode 3: Chaos Theory
After speaking with Taylor in the bathroom and confirming that Victoria has left, go into Victoria's room and let your camera light charge up the glow-in-the-dark figure on her shelf. After a few seconds you'll be able to take a picture of it.
Camera Eye
RareTake all optional photos in Episode 3: Chaos Theory
Episode 3 (Chaos Theory)'s 10 optional photos. Same deal: missable live, but Collectible Mode lets you mop up any you missed after finishing the episode. Use rewind to set up shots and a location guide to catch them all.
Tripod
RareTake optional photo #10 in Episode 4: Dark Room
At the party, look up towards the roof where you will see the double moons, take a picture of it.
On Display
RareTake optional photo #8 in Episode 5: Polarized
You'll be in school, but the entire scene is playing out backward around you. Walk down the hallway and turn right to find the skeleton in the corner. Instead of the usual prompt to take a photo, the journal prompt will show up in the bottom corner of the screen as if you have already taken it. Open your journal and the achievement will unlock.
Light Meter
RareTake optional photo #9 in Episode 5: Polarized
In the third section you'll be sneaking past Warren through some lockers. You'll go left around the first set of lockers, then need to turn right at the next set. Samuel will go by, and after two more quick rights, you'll find Warren's locker. Open it and take a photo of what's inside.
Shutterbug
RareTake all optional photos in Episode 4: Dark Room
The 10 optional photos in Episode 4 (Dark Room). Missable on the playthrough but recoverable through Collectible Mode once the episode's done. Rewind to line up the fiddly ones; a photo-location guide pins the exact spots.
Selfie Awareness
LegendaryTake all optional photos in Episode 5: Polarized
Episode 5 (Polarized)'s 10 optional photos - the last set. As with the others, Collectible Mode after finishing the episode lets you grab any you missed, so it's never lost for good. Use rewind for the tricky angles and follow a location guide to complete the set.
Related games


Breakdown
Track your progress
Sign in with Steam or Xbox to mark off unlocks, filter what's left and showcase your 100%s.
- Live unlock status per achievement
- Hide-unlocked filter
- 100% showcase on your profile